hole by hole ANALYSIS
Canterbury Golf Club has been nationally recognized as one of the top 100 golf courses in the U.S. and one of the finest in Ohio. Designed by Herbert Strong, the traditional Scottish course was expertly constructed to embrace the area’s natural topography resulting in a demanding, but fair, course with a great variation of holes. The Final Three Holes at Canterbury are considered by many to be the best three finishing holes in golf.
Hole # 1 Par 4 - Championship tees: 443;
Canterbury tees: 435.
A long par-4 dogleg right with a blind tee shot. It plays as the #4 handicap from the member’s tees and is one of the most difficult opening holes in golf. After a good tee shot, shaped from left to right, players will need to focus their attention on keeping the ball below the hole with their approach. Shots can be run onto this green, which is severely sloped from back to front. This is a very difficult putting surface.
Hole # 2 Par 4 - Championship tees: 374;
Canterbury tees: 348. A short but tricky dogleg left Par 4 that will require an accurate tee shot to stay out of the fairway bunkers, trees on the left and the rough. The approach shot must negotiate the eight bunkers that surround this green. The green is sloped severely from back left to front right so controlling your spin is essential.
Hole #3 Par 3 - Championship Tees: 177 yards; This par three is arguably the most photographed hole on the course. It is a charming view with the clubhouse in the background, but a true iron strike is necessary due to a well bunkered green and the pond in front. The green appears to be somewhat flat, but from above the hole it is deceivingly fast. Tom Watson would agree, as he 4-putted this hole during his second round during the 2009 Senior PGA Championship.
Canterbury Tees: 150 yards
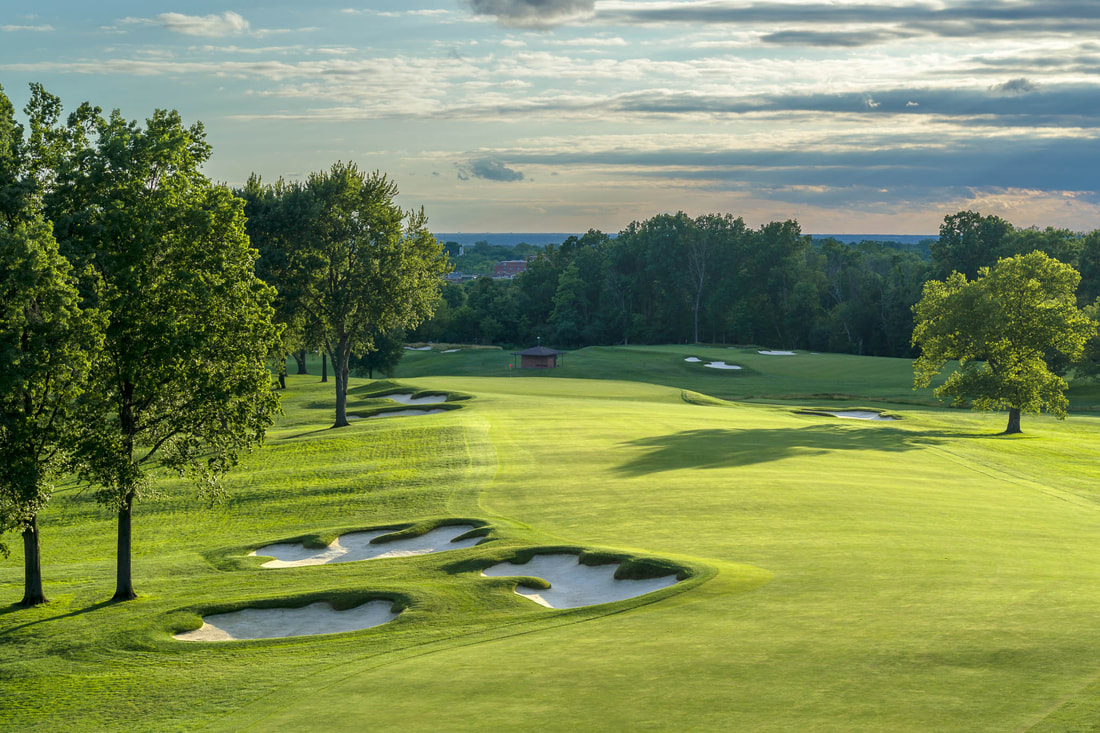
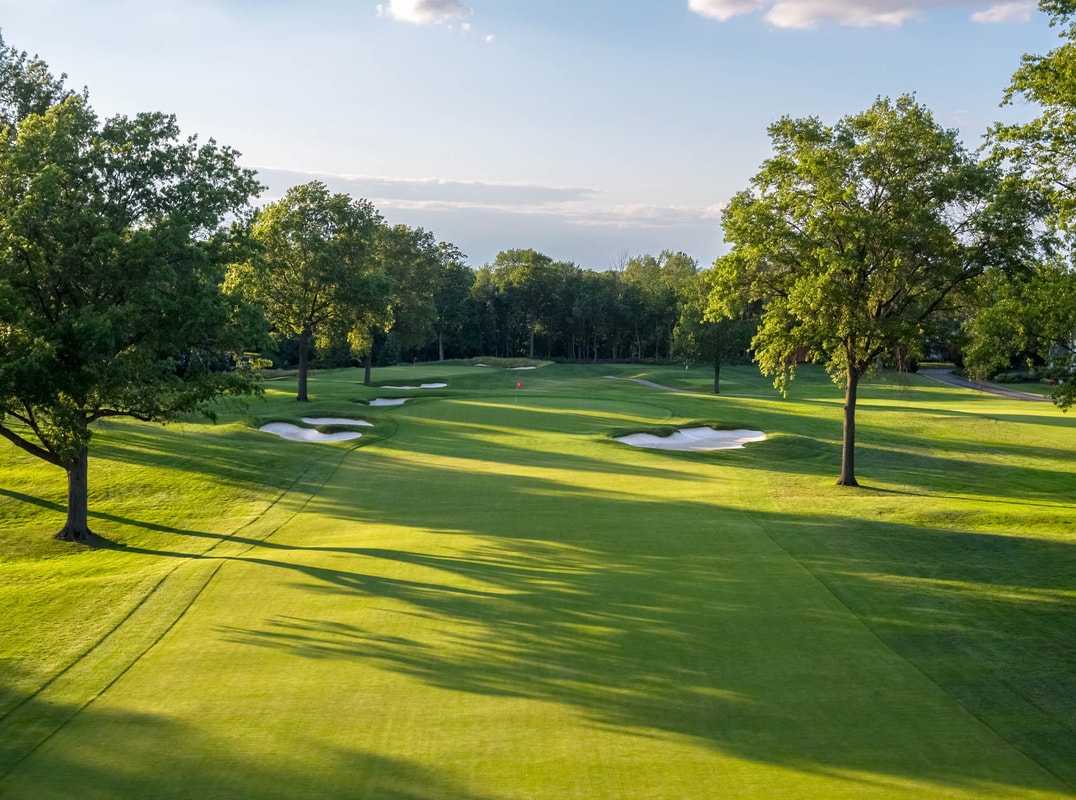
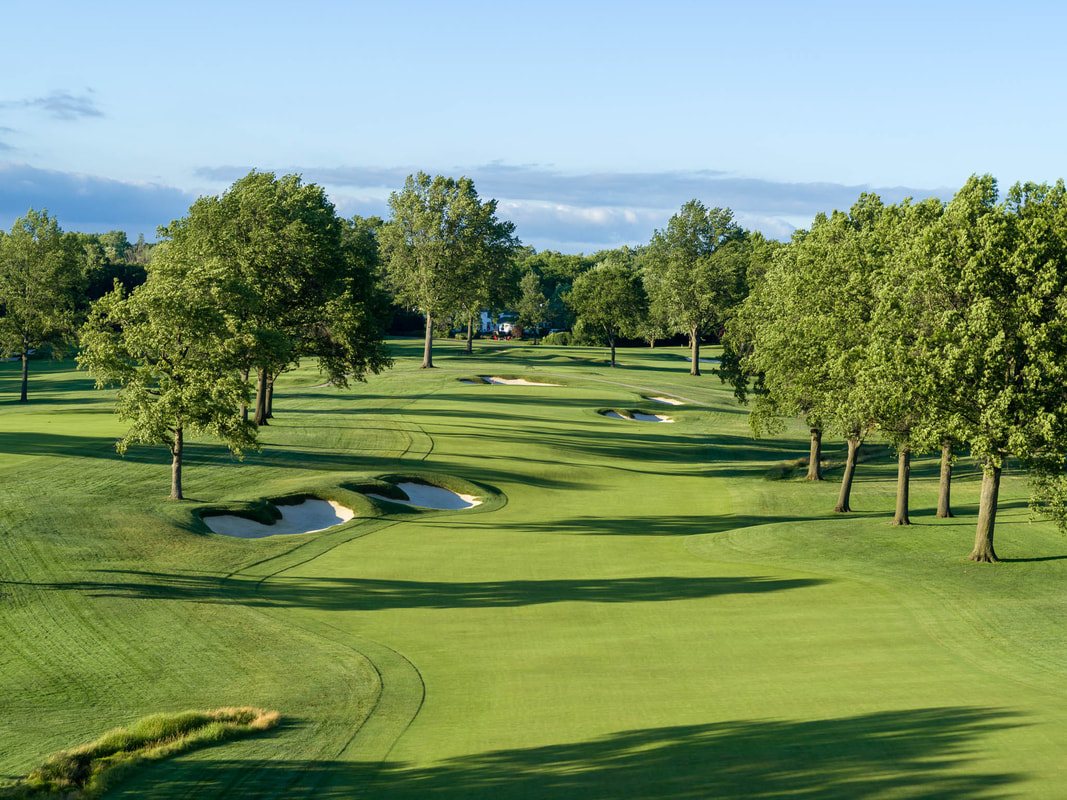
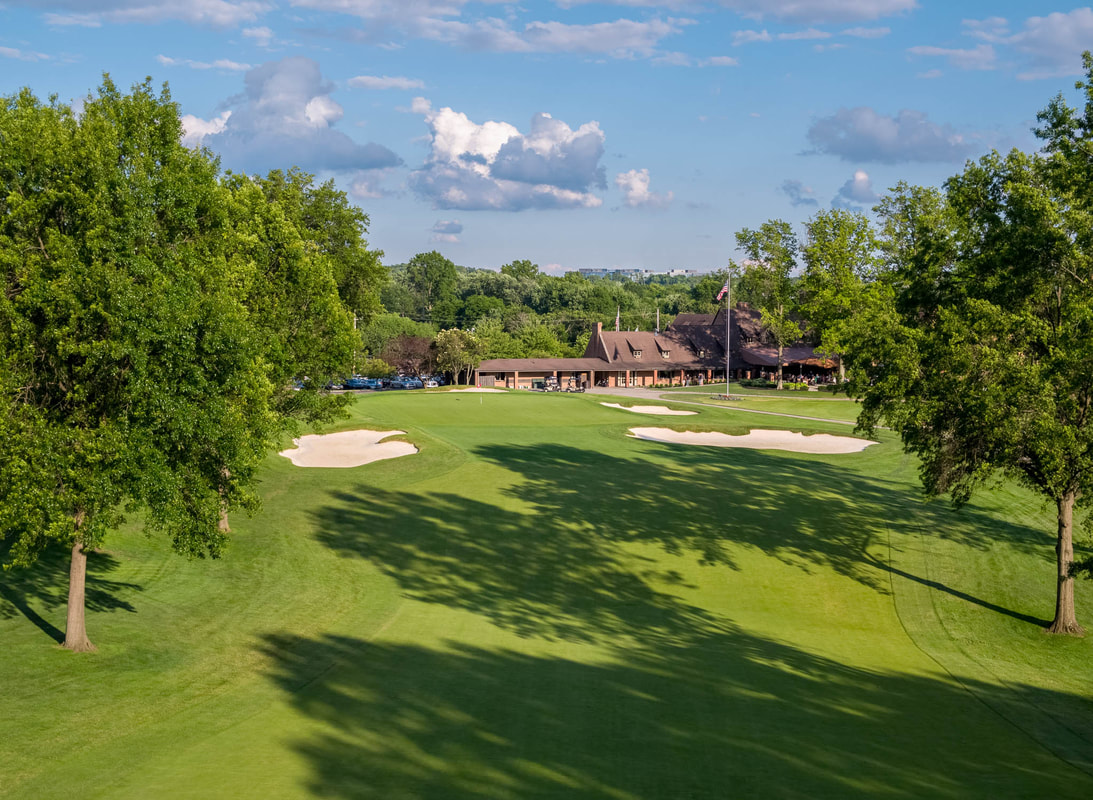
Hole #4 Par 4 - Championship Tees: 489 yards;
Canterbury Tees: 420 yards. This long par four is a favorite of many who play Canterbury. The nest of fairway bunkers fit perfectly into the hillside and ask the golfer to make a choice for your tee shot; take on the bunkers and leave yourself a shorter approach or bail out to the right and play a longer, possibly blind 2nd shot. The hole bends from right to left and the hogsback fairway can make it tougher to hit and also make for another uneven lie. The green is very large and wide open in front to allow for run up shots. This green is the widest on the course, but don't miss it to the right, as a very large and deep bunker can swallow up your golf ball. Many approaches end up short here due to the infinity look beyond the green.
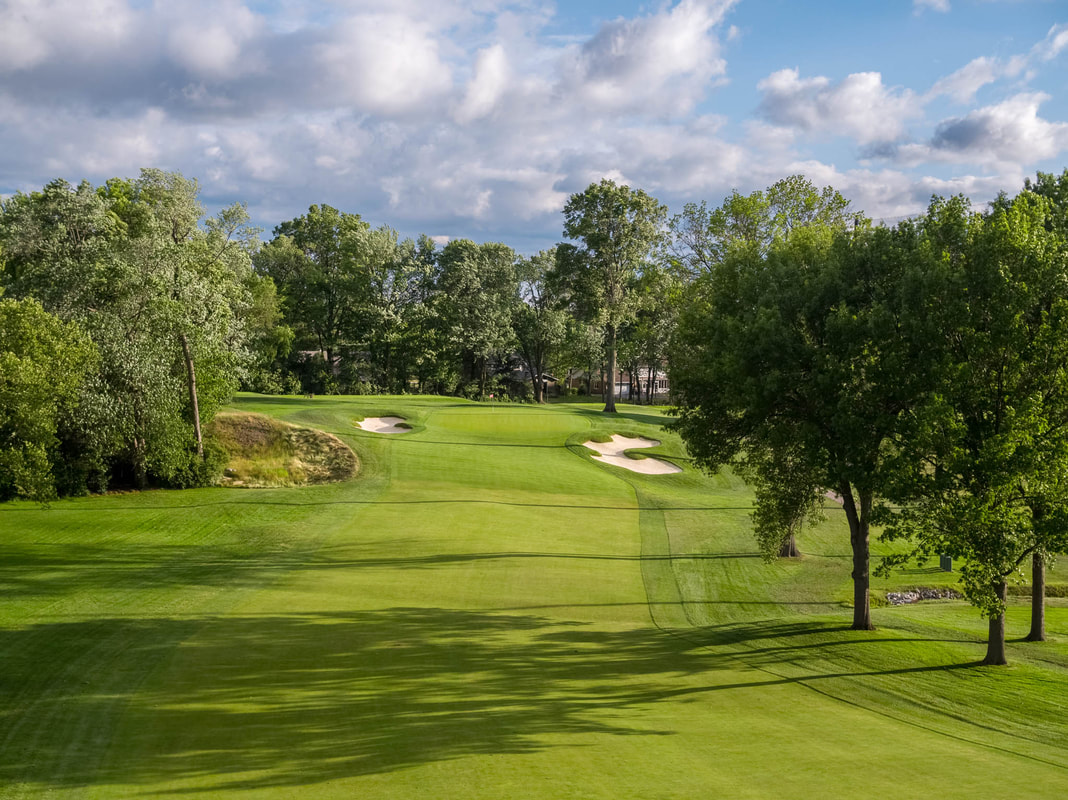
Hole #5 Par 4 -
Championship Tees: 412 yards;
Canterbury Tees: 389 yards. This very picturesque par four in a valley is one of the best driving holes on the course. The fairway meanders ever so slightly from right to left. The fairway bunkers on the left must be avoided as they make getting your next shot to the green very difficult. The green is slightly uphill so the approach shot will play longer than it appears. The green has a large slope that funnels golf balls to the front, right side of the green. Balls that go over the green will undoubtedly find the large rear greenside bunker.
Hole #6 Par 5 -
Championship Tees – 522 yards;
Canterbury Tees – 501 yards. The first par five on the course provides an excellent opportunity for scoring, however it's not a pushover. The tee shot is critical as anything center of the fairway or left will run off the slope into the left rough. Trees guard the left side and can block your view to the green. The green is one of the most difficult to read on the course with a lot of very subtle breaks. Par on this hole is not protected by length, but by the bunkers guarding the green and the severe slopes on each side of the putting surface. Birdie is attainable here, but a poor shot will almost certainly lead to bogey. This hole has played as a par four in some of our more recent Professional events.
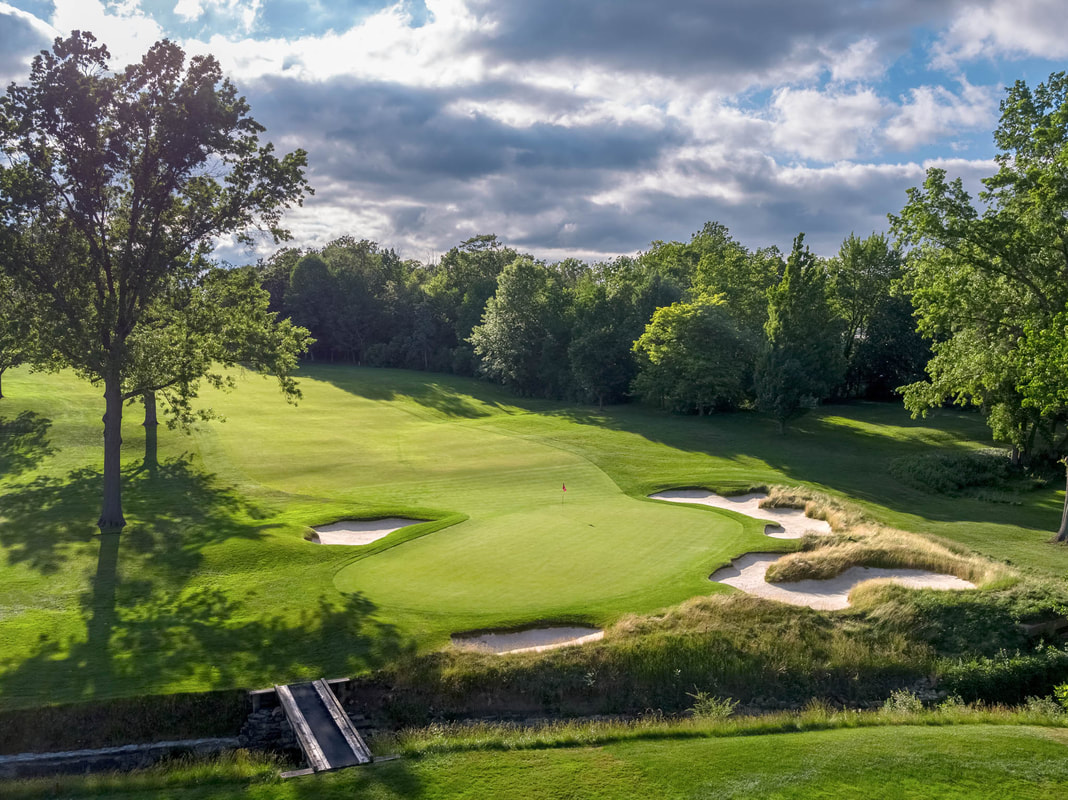
Hole #7 Par 3 -
Championship Tees: 198 yards;
Canterbury Tees: 170 yards. This mid length par three requires a very straight shot. Misses left or right of the green rarely end up with a par. The left side is very severe with a sharp drop off and a deep bunker. The right side features two bunkers and a trough of deep rough with the green sloping away from you. The green slopes from front-left to back-right.
Hole #8 Par 4 -
Championship Tees: 410 Yards;
Canterbury Tees: 362 Yards. The eighth hole starts with a focus on position off the tee. Use a club off the tee that keeps you in the fairway, somewhere between 100 and 150 yards from the green. After you have done that, the approach requires a true strike due to a very severe false front and a steep sloping green from back to front. Controlling your distance and spin is a must. Players can be aggressive if putting from below the hole, but if you find yourself above the hole, use caution or you may need to grab a wedge for your next shot. During the 1946 US Open, Ben Hogan made a quadruple bogey, eight during one of his rounds. He ended up missing a playoff by one shot.
Hole #9 Par 5 -
Championship Tees: 552 Yards;
Canterbury Tees: 540 Yards. A long tee shot under certain conditions may give a player an opportunity to reach this par five hole in two strokes. Tom Watson was the only player in the 1973 PGA Championship to reach this green in two strokes. However, this hole played as the easiest hole in relation to par during all three of the DAP Championship events (2016-2018), with most of the field reaching the green in two. The green has two tiers and hole locations on the upper tier will lend more birdies. A front right hole location looks inviting from the fairway but is one of the most difficult on the course and generally used during most of our major Club events.
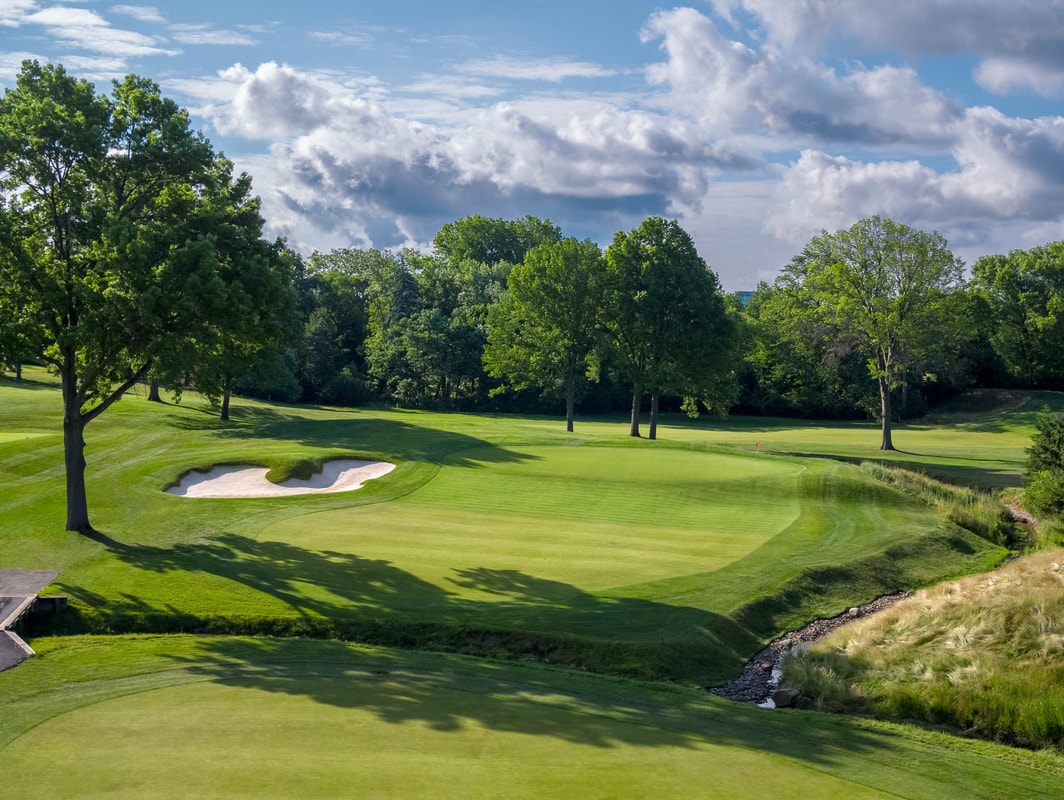
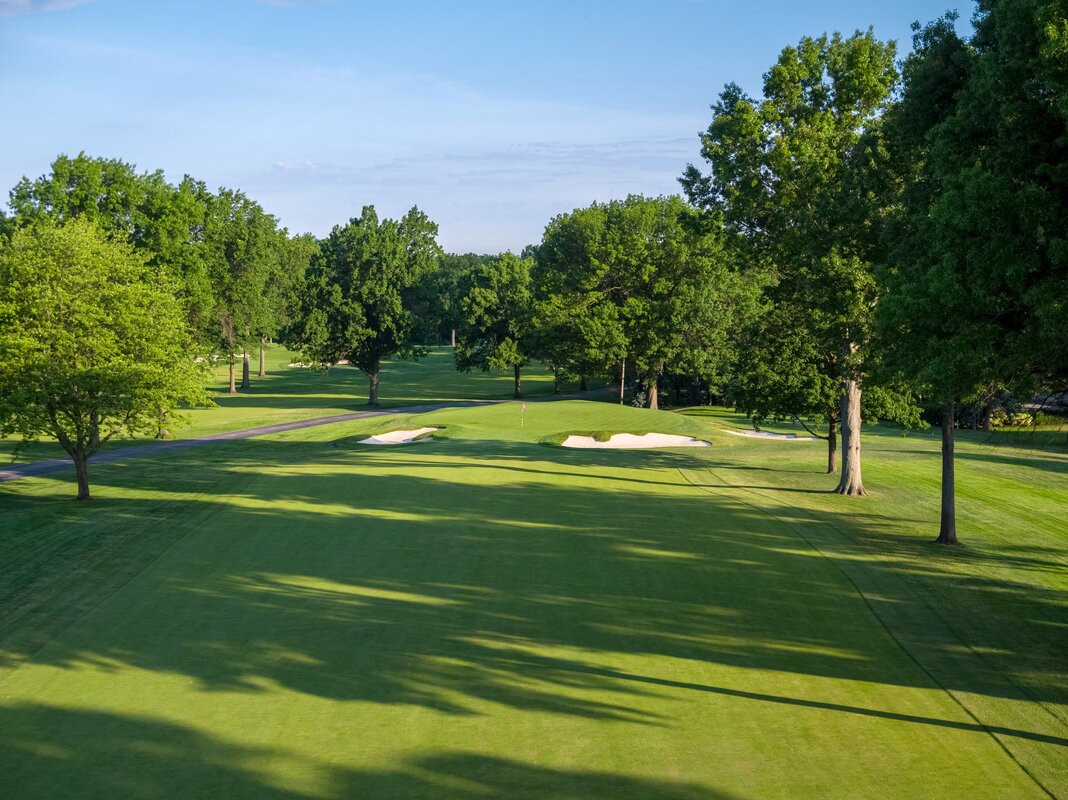
Hole #10 Par 4 -
Championship Tees: 358 Yards;
Canterbury Tees: 341 Yards. An outstanding short par four. A creek crosses the fairway at 250 yards off the tee, so most players will hit less than driver off the tee. The green has a false front and if shots do not carry to the center of the green and beyond they will spin back off the green and leave a difficult up and down. Controlling your golf ball is a must on this hole and the green will be challenging to putt. This is one of the more narrow greens on the golf course from back to front.
Hole #11 Par 3 -
Championship Tees: 180 Yards;
Canterbury Tees: 141 Yards. Generally played as the shortest hole on the course, the swirling winds and the hole location can make all the difference here. The green is well bunkered and elevated, so shots must carry onto the green. When the hole is placed on the right side of the green, consider taking an extra club because it requires more carry than the left or center of the green. Up and downs are rare here, but the green is plenty large, considering its modest length.
Hole #12 Par 4 -
Championship Tees: 371 Yards;
Canterbury Tees: 359 Yards. A blind tee shot on this short par four that bends from left to right all the way to the green. Many players hit less than driver on this hole, however some may take out the big stick and try to drive it down close to the green. Keep your tee shot towards the left side, because a right side miss will most likely result in bogey or higher. This green sits below the players from the fairway and does gently slope from front to back. When conditions are firm, a hole location on the front of this green is extremely difficult to get the ball close. Again, a well guarded green, with many bunkers to catch errant approaches. This is another very tricky green to putt, however most seasoned caddies will say that most putts break towards the Club's entrance road to the left of this green.
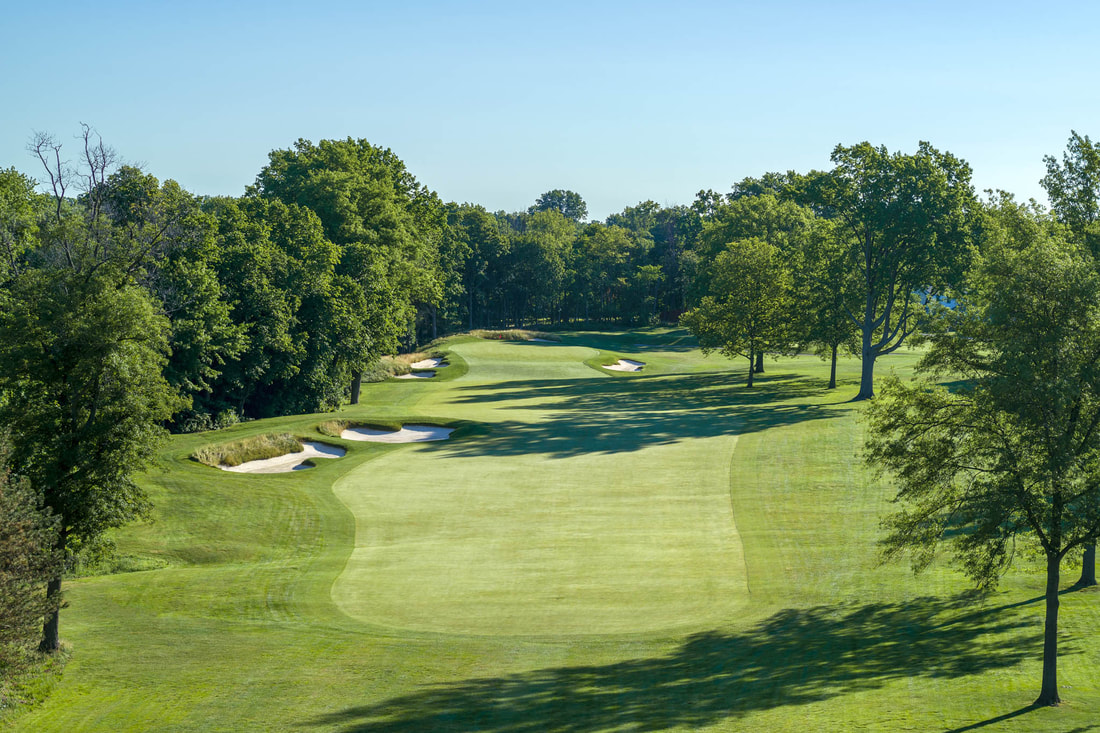
Hole #13, Par 4 - (Champ), Par 5 (Canterbury)
Championship Tees: 490 Yards;
Canterbury Tees: 480 Yards. This hole is played as a par five on the scorecard, but in most Major Championships it has been played as a par four. Tee shots need to favor the center, anything right will end up in the rough. If you can hit it long and catch the downside of the hill, you may end up with a middle or short iron for your second. The view from the top of the hill is a great one and this shot can be very entertaining due to the trundling fairway that can guide a ball onto the putting surface from the proper angle. A deep bunker guards any right side hole locations. The green is narrow and since it was built to receive shorter approach shots, is difficult to hold a long approach. While many players adore this hole, we're not sure the legendary Byron Nelson would share those feelings. He received a one-stroke penalty on this hole during the 1946 US Open when his caddie accidentally kicked his ball in the rough. Lord Byron would go on to lose that Open in a 3-way 36-hole playoff.
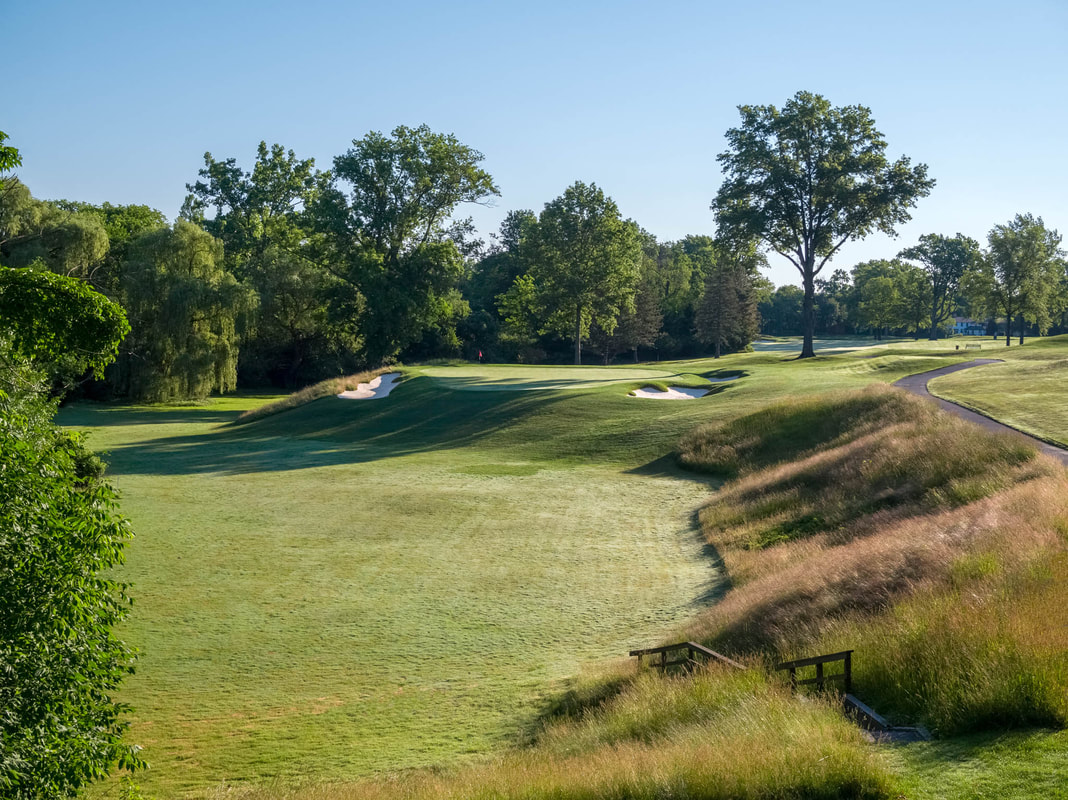
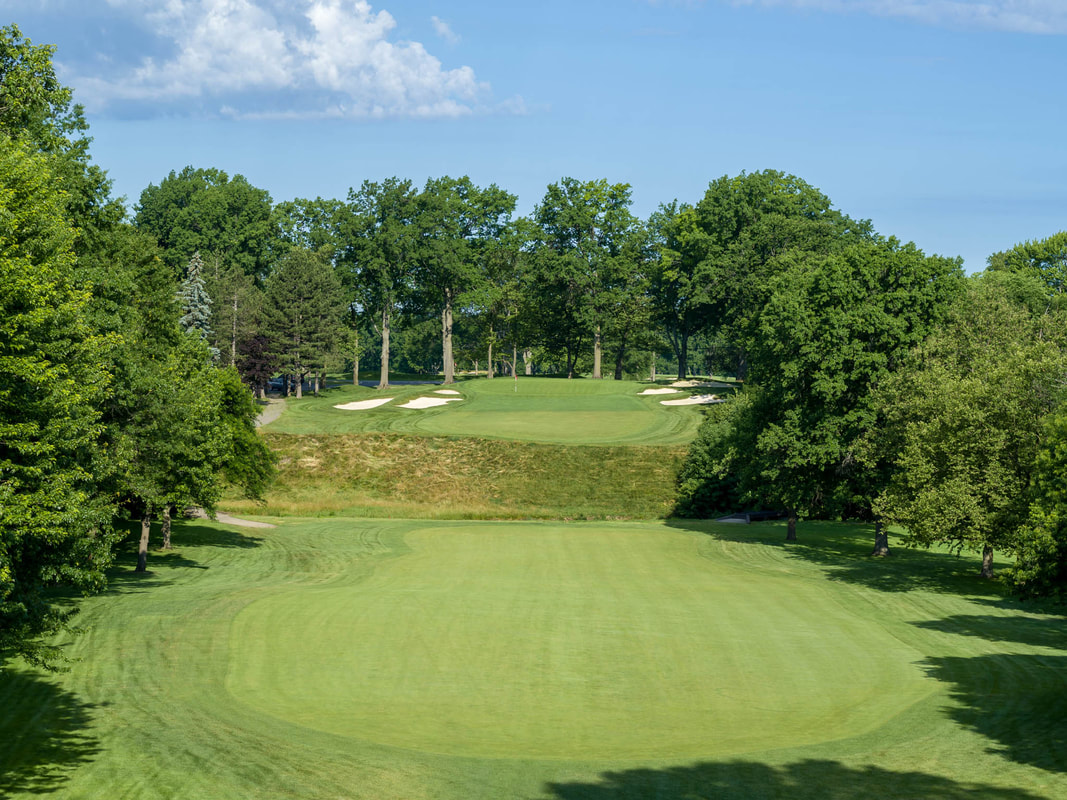
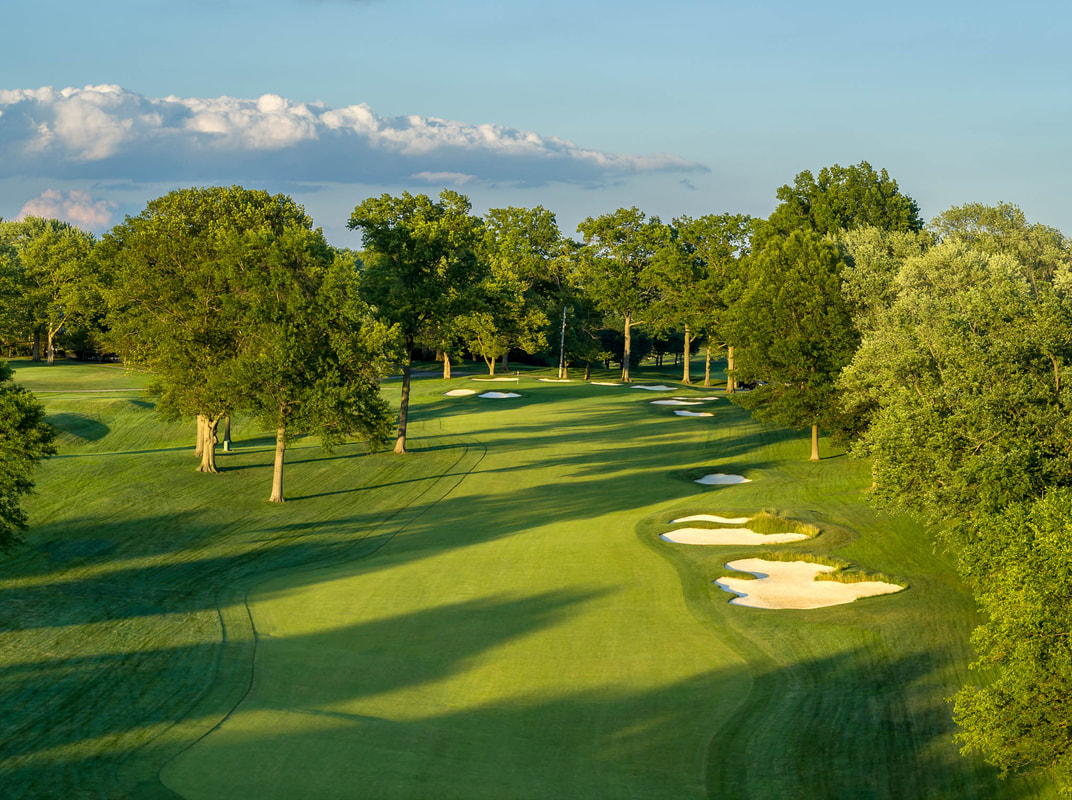
Hole #14 Par 4 -
Championship Tees: 384 Yards;
Canterbury Tees: 370 Yards. Hitting the fairway is a must, but much easier said than done on this hole that features what is arguably the toughest fairways to hit on the golf course. Another blind tee shot greets the players, requiring a similar shot to the one that is required on the 12th hole. Shots coming out of the left rough will be difficult to stop on this elevated and firm green. But a false front and a large bunker on the front-right play havoc with golfers. A front-right hole location is very tricky due to those features, but no putt is easily holed due to a pair of subtle ridges in this green that run from front to back. This hole is much more demanding than the yardage indicates.
Hole #15 Par 4 -
Championship Tees: 367 Yards;
Canterbury Tees: 349 Yards. One of the bolder holes designed by Herbert Strong thanks to a large embankment that must be negotiated in order to complete the hole. Players may choose to drive the ball up to about 260 yards, however the closer you get to the creek that crosses the fairway the less you can see of the green, and the more the 40-50 foot hill stares you in the face. If the approach is extremely intimidating today, imagine how the Club's founding members must have thought when they tried to play the shot over the hill with the golf ball and equipment of the 1920's. The green is also a good one, with two distinct tiers. Players who don't find the proper tier with their approach, will be begging for a two-putt.
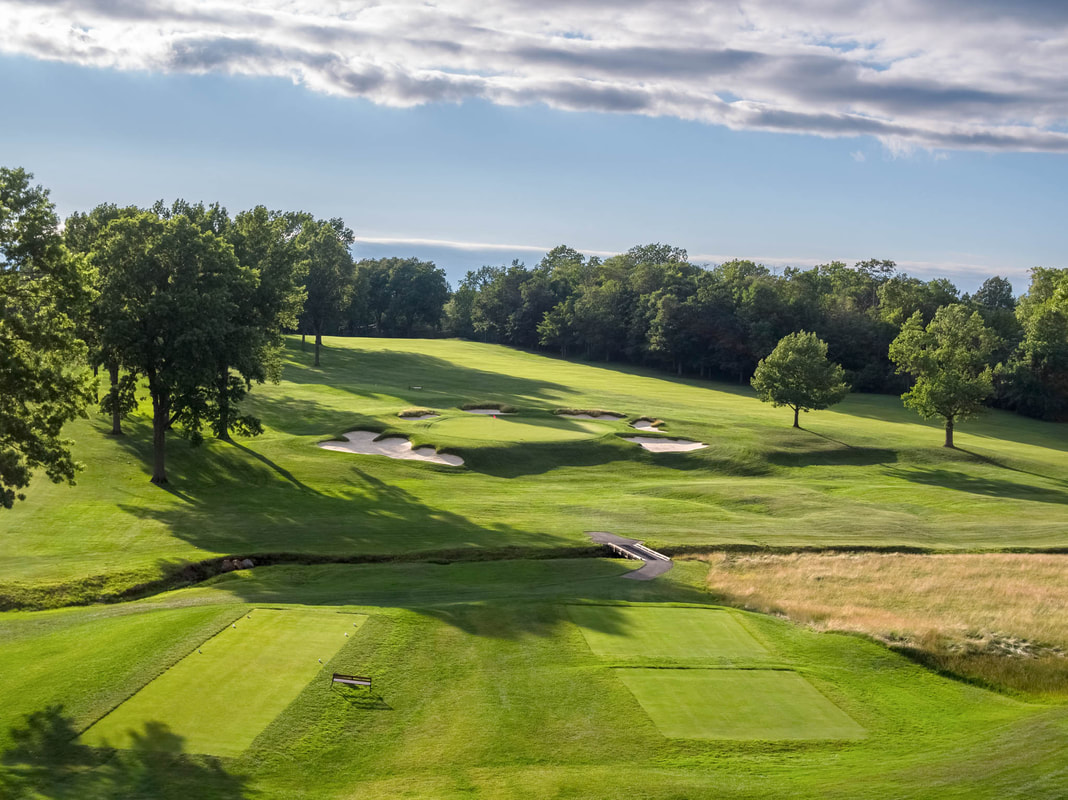
Hole #16 Par 5 -
Championship Tees: 617 Yards;
Canterbury Tees: 585 Yards. The next three holes are considered by many to be the best three finishing holes in golf, so cross the road and buckle up! The lengthy par five 16th requires a well struck tee shot that finds the fairway. Drives that challenge the left side can catch a down slope to gain additional yardage. However, if you do not find the fairway, your likelihood of seeing the green with your third shot dramatically decreases. Most players will try to crest the hill with their second shot and leave a 130 yard approach from the top of the 2nd hill. However, some players in the modern game have been successful at hitting the green in two, though very rare. For most mortals, their third shot will do well to find the putting surface and avoid the rear bunkers. This green is one of the fairest putting surfaces, so be aggressive when you can. When Canterbury was founded in 1921 the hole played as a 662 yard par six!
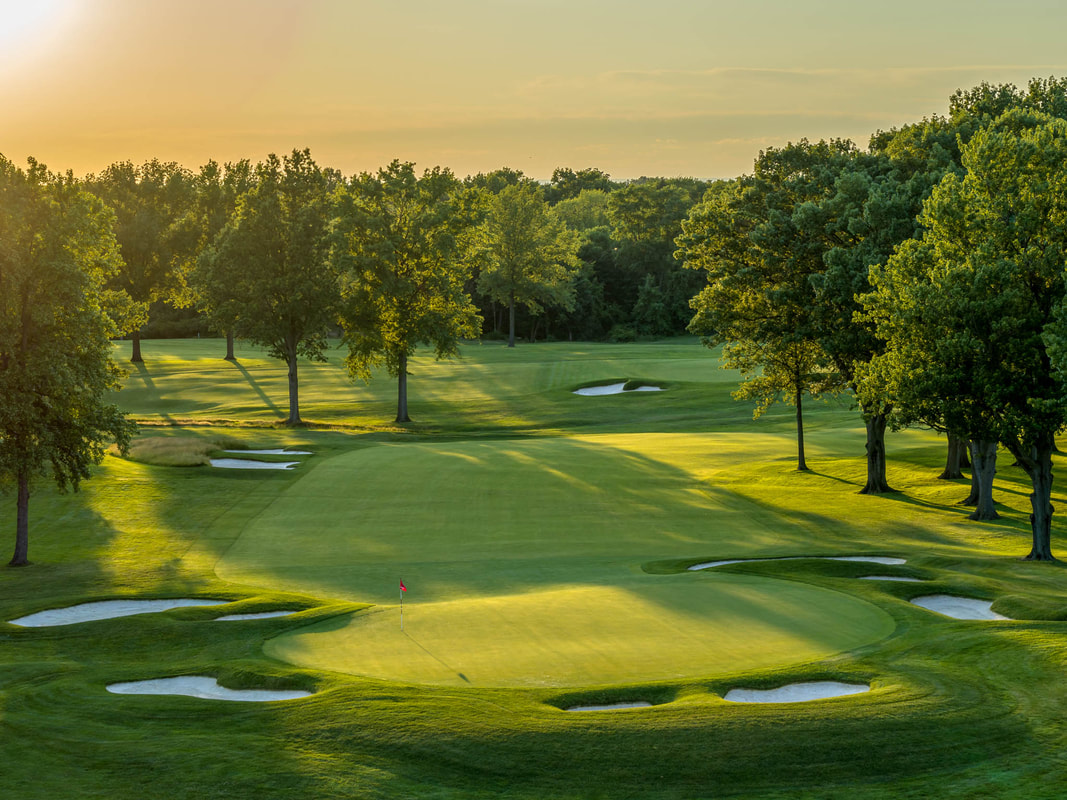
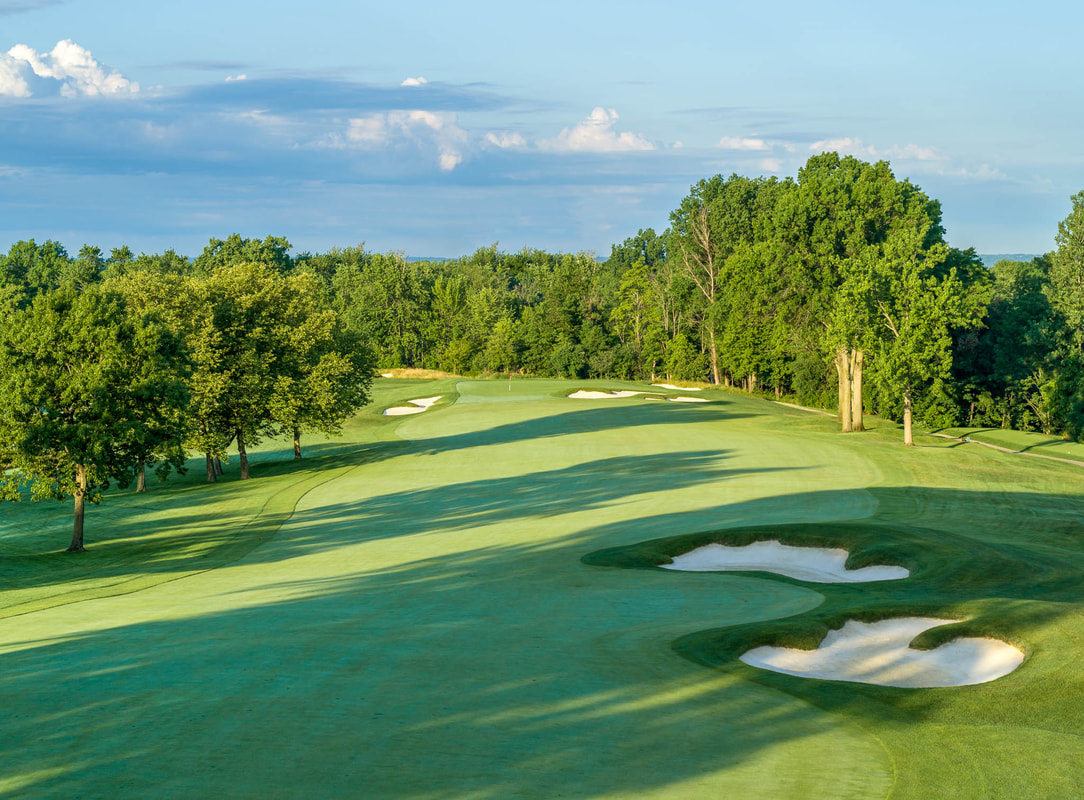
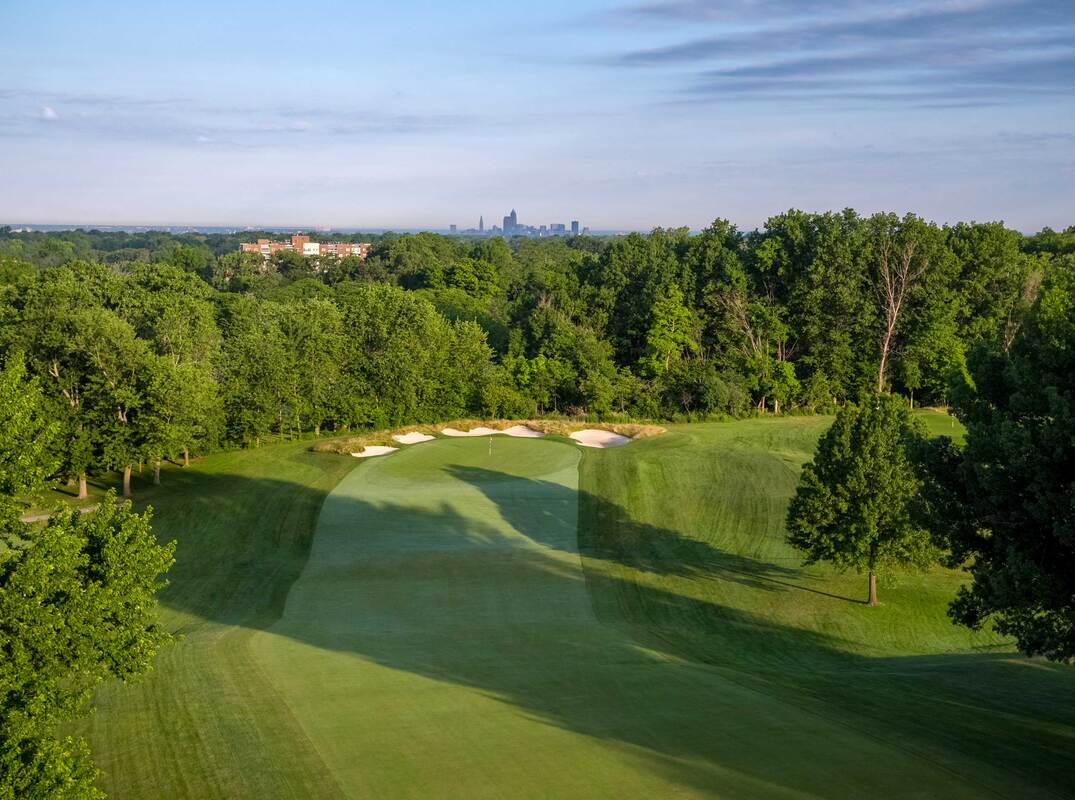
Hole #17 Par 3 -
Championship Tees: 229 Yards;
Canterbury Tees: 197 Yards.
Take par as your score here and go to #18. The hole is long and narrow with a green that is elevated and has two tiers. The slopes off either side are severe. Getting the ball up and down will require creativity and some luck because of the rough around the green and the slopes. The putting surface is extremely difficult with significant slope which will definitely yield some three putts. This is arguably the hardest hole to par on the golf course.
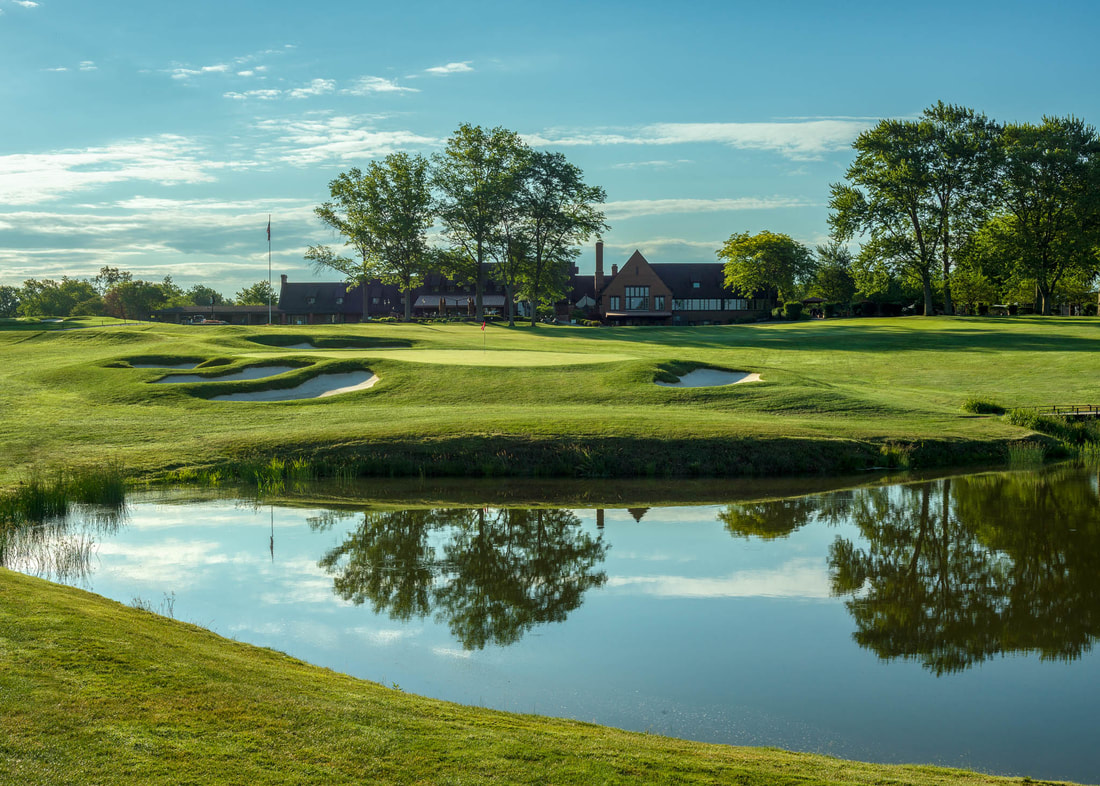
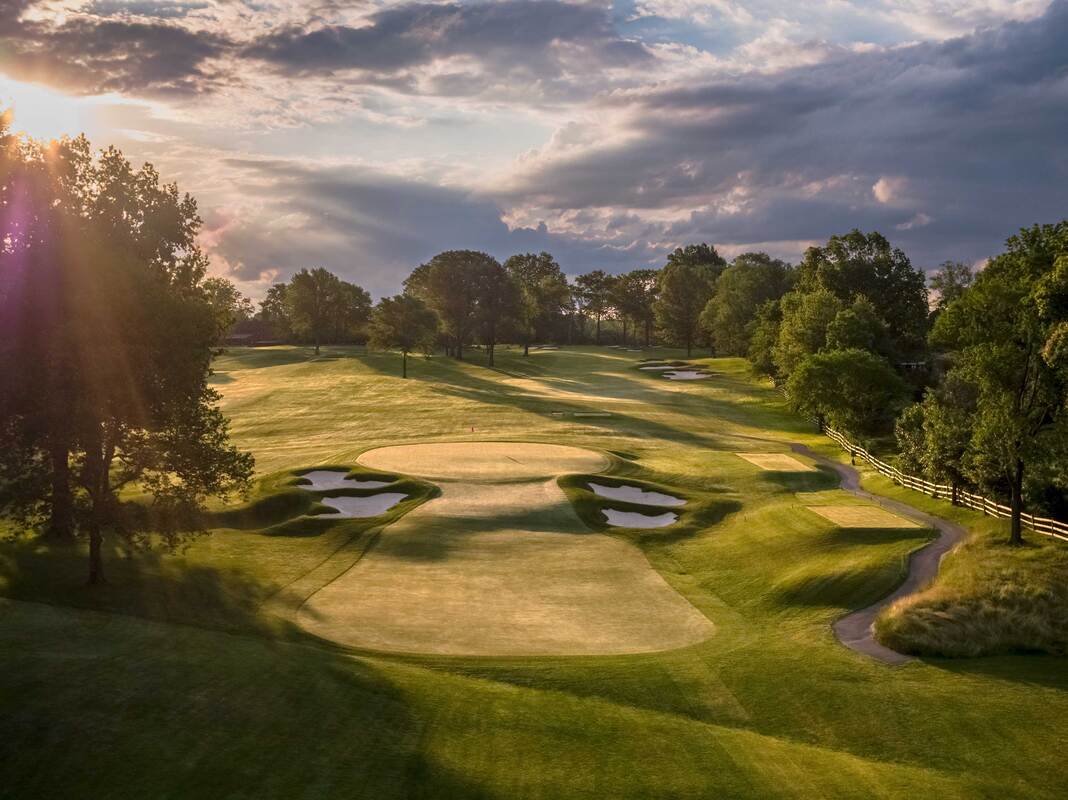
Par 4, Black Tees: 445, Blue Tees: 400 yards. One of the best finishing holes in all of golf. A long, uphill par four where an accurate drive is required. Pronounced bunkers protect the right side of the fairway from errant tee shots, while tall trees protect the fairway on the left. Second shots will require a long-to-mid iron to an uphill green. The green is heavily bunkered, but open from the center right to accept run-up shots. The green slopes from back to front, with some other subtle breaks. If the player is not careful, putts can get away. During the 1946 U.S. Open, Ben Hogan three-putted from 15 feet and failed to earn a spot in the playoff, which was won in 36 holes by Lloyd Mangrum.